Books

User Interface Development for Android App Using Kotlin and Jetpack Compose: Maize Info App as an Example.

For details and to get the book, go to Amazon.


---------------------------------------------

Android Application Development using Kotlin (Build a Digital Note App from Scratch): Stage-by-stage explanation of how the app was developed from start to finish.
 
For details and to get the book, go to Amazon

 
---------------------------------------------

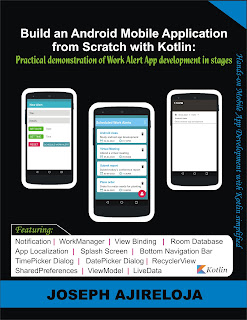
Build an Android Mobile Application from Scratch with Kotlin: Practical demonstration of Work Alert App development in stages.
 
For details and to get the book, go to Amazon.
 
 
---------------------------------------------

Computer Proficiency for Everyone: An excellent guide with practical lessons on Computer Fundamentals, Microsoft Word, PowerPoint, and Excel.
 
For details and to get the book, go to Amazon.
 
 
-----------------------------------------------
 
 Good Practices in Preparing your Microsoft Word Document.
 
For details and to get the book, go to Amazon.


Popular Posts

Android Development: Addition of Bottom Navigation Bar with Kotlin and Jetpack Compose

  Introduction In this article, we will add bottom navigation bar to the second screen of the “Demo One” App that I have been using for demonstrations in my previous Android development articles. The bottom navigation bar will have three navigation items, which are, “Home”, “Info” and “Settings”.  The navigation items would be programmed to render their contents on the screen accordingly when clicked or tapped. Note that the “Demo One” Android project already had a TopAppBar, as added in my previous article. The user interface of the second screen of the Demo One App is as shown in Figure 1. Figure 1 Addition of Needed Dependency The dependency that we will need for the addition of bottom navigation bar to our Android project is called “navigation”. Let us now open the module-level build.gradle file in our Android project and add the version 2.6.0 of the navigation dependency. After the addition of the dependency, we will connect to the internet and then click on “Sync...

How to add background image to your Android project with Jetpack Compose

  Introduction: There could be instances when we might decide to use an image as the background instead of the default background color for some specific screens in the Android app we are developing. With the combination of Jetpack Compose and Kotlin programming language in Android Studio, this can be easily achieved. One of the ways to achieve this is to make use of Box layout composable and add the background image as the first element in the Box layout. Box layout makes elements or items placed in it to be stacked on each other; so, every other element will be placed on the first element (which will be a background image in our own case). After adding the Image composable, we can add another layout such as Column or Row or even another Box that will contain the other items (such as Text composable, Button composable, and so on) that should be on the background of the app screen. Demonstration: In this demo, we will be adding a JPEG image named “demo_bg” as our background...

Android Development: Adding New Activity, Explicit Intent and Top App Bar with Jetpack Compose

  Introduction In this article, we will continue with the practical demonstration of Android development using our “Demo One” Android project as an example. Note that in my previous article, I demonstrated how to add AlertDialog to MainActivity.kt, and programmed it to show when the “Click Here to Proceed” button is clicked. The AlertDialog contains a button with the text “NEXT” (as in Figure 1). Figure 1 When the “NEXT” button is tapped or clicked, the AlertDialog will close, and then, the app will navigate back to MainActivity. In this article, we will add a new Activity named “SecondActivity”. Next, with the use of “intent”, we will program the AlertDialog “NEXT” button to navigate to SecondActivity when tapped. Next, we will add top app bar to our SecondActivity. Let us now open our “Demo One” project (as in Figure 2) and continue with the development process. Figure 2 Creation of a new Activity named “SecondActivity” There are different methods of creating ...